Friday 28 November 2014

Mummy Lunch Caesar Salad Wrap

Wow, what a flashback! I found this Tupperware sandwich keeper plus lunch amongst my un-blogged lunches. This is from early 2013 when I had 15 minutes for my lunch break at work. Even with that time I still packed a few lamington fingers for a treat ;-)
I love a good wrap and the trick with this one is to make sure everything is prepped so in my limited time all I had to do was lightly heat the chicken and egg in the microwave while I assembled the rest of the wrap. Using muffin cases to separate the ingredients ensured my croutons remained crunchy and made it easier to reheat those few elements.

This is a great lunch for re-purposing any bread scraps you've collected in both the croutons and the crumbed chicken.

 Details of my tools & toys can be found on this page.

~J

Disclosure: This is not a sponsored post. This post was written for Loving Lunches. No product was received for this post. All opinions expressed are my own, based on my personal experience with the product. This post may contain affiliate links.

Wednesday 26 November 2014

Quinoa Stroganoff

 I can't take credit for this creation. Mr Loving came up with it.

In the stinking heat that has been our early introduction to summer this year it has been difficult to come up with dinners that are satisfying, healthy, balanced and most of all not going to steam up the house even more. This stroganoff sauce added the perfect amount of flavour and vegetables to our meal.
 Served with store bought BBQ chicken and basic quinoa from our 52 New Foods Challenge cook book.

  • Sauté 2 medium brown onions and a few cloves of garlic in a little oil. 
  • Add 4 rashers of diced bacon and brown well. 
  • Roughly chop half a dozen tomatoes. Add these and 2 cups of chicken stock to the mix and allow to simmer until sauce starts to thicken.
  • Finish with a tablespoon or so of paprika and a good cup of sour cream.
  • Season to taste.


Details of my tools & toys can be found on this page.

~J

Disclosure: This is not a sponsored post. This post was written for Loving Lunches & 52 New Foods Challenge who generously provided me with a copy of their book. All opinions expressed are my own, based on my personal experience with the product. This post may contain affiliate links.

Monday 24 November 2014

Simple Sandwich

I know I'm not the only one who has those 'really - you need to eat *again* today' moments. Hows' this for a quick bit of love in your lunch?

A Puzzle Lunch Punch and some FooDoodlers turn this boring lunch into a little fun. Served with some pepperoni and cheese, yoghurt and milk. All in our Easy Lunch Boxes. Just so happens that the next morning Miss M asked for a heart sandwich, so we must have been on the same wavelength :-)

Details of my tools & toys can be found on this page.

~J

Disclosure: This is not a sponsored post. This post was written for Loving Lunches. No product was received for this post. All opinions expressed are my own, based on my personal experience with the product. This post may contain affiliate links.

Friday 21 November 2014

Spike Sandwich

 Flashback Friday this week doesn't flash back quite so far as usual. I found this unblogged lunch from earlier this year.
 Miss M was *right* into My Little Pony at the beginning of the year. So much so that she insisted on a My Little Pony Party and I purchased (a little too late for the party) some cookie cutters from Warplane Prints. Not only can you use them as cutters, but they make great sandwich stamps :-).
 I used a home made stencil to colour in some pepperoni too.
 I think it worked out quite well that I'd purchased the purple Nude Food Mover as well as the original. It meant I could colour co-ordinate Spike's purple and green everywhere. Including for Miss M's fruit snack.
 I used my pocket sandwich maker to create an even square and laid the crusts below to write Spike's name. Then using the cookie cutter, made an imprint in the bread before colouring with FooDoodlers.
She also had a fruit juice and Sinchies yoghurt pouch.

Details of my tools & toys can be found on this page.

~J

Disclosure: This is not a sponsored post. This post was written for Loving Lunches. No product was received for this post. All opinions expressed are my own, based on my personal experience with the product. This post may contain affiliate links.

Wednesday 19 November 2014

Yummay Edamame

I've been playing with my new toy tool in the kitchen - the 52 New Foods Challenge recipe book is brilliant! The recipes are simple and achievable - even on a 'school night'.

Although this one I did try on a weekend. Perhaps a 'school night' would have been better - I may have been paying enough attention to the ingredients list and *shelled* the beans ::facepalm:: 
(Ok, so maybe it's because I've only ever eaten them at Sushi trains and didn't even think about shelling them - shhh!)

So my first attempt didn't really 'pop'. . . 

. . . but it sure tasted good.

These little babies actually ended up being my lunch. Yum-may!

But the Edam-yum-ay fun didn't stop there. A few nights I asked Miss M what sort of potatoes she'd like for dinner, expecting an answer of mashed or chopped. Instead she replied 'Grinch Potatoes'. Well of course! It is the season!

I remembered my back-up bag of Edamame in the freezer (I was so excited to find them at my grocery I bought two!) Popped them in the steamer alongside the sweet potato and carrots until tender.

Mash your potatoes well (we whisk in a raw egg instead of milk - trust me! Try it!)

Then shell your Edamame into the mix

I used a fork to mash them through but a potato masher would have been the smarter choice. I decided they weren't quite 'Grinchy' enough, so turned to Miss M. 'How do you think we can make the potatoes more Grinch?'
'Add more' she replied without skipping a beat! Well, I didn't have any more so mashed in a handful of frozen peas instead. Don't forget to season to taste.

And served on her Fred Face Plate, needless to say she was eager to sample!

Have you taken up the 52 New Foods Challenge yet?

Details of my tools & toys can be found on this page.

~J

Disclosure: This is not a sponsored post. This post was written for Loving Lunches & 52 New Foods Challenge who generously provided me with a copy of their book. All opinions expressed are my own, based on my personal experience with the product. This post may contain affiliate links.

Monday 17 November 2014

Wall-E Lunch

There's something so very sweet about Wall-E and I'm so glad that Miss M has finally shown an interest in it (makes a change from My Little Pony). She was so excited when I suggested I should make her a Wall-E lunch.
Of course I suggested E.V.E. be made from a boiled egg. It's such an obvious choice and I know I'm not the first to come to that conclusion. Some nori and FooDoodlers finished the job. Using an eye pick and a square silicon cup, filling it with a block of cheese wasn't much of a stretch either, but when Miss M insisted on including the boot with the plant I was a little lost. Until I remembered these cute picks - hey presto!

She also wanted the scene where Wall-E & E.V.E. dance but was happy just to have some star sprinkles in her yoghurt for the night sky instead. She didn't even complain about the colour running :-)

For snack I sent some more bean sprouts (a.k.a. plant) along with some crackers, cheese and ham stars to make a Pizza Plant
Against all odds I actually had time to experiment in the morning so I made actual pizza rice crackers for her. Simply spread with a smidgen of pizza sauce and top with a little mozzarella and ham.

The ham offcuts were rolled into a 'flower' and placed beside Wall-E. She had a simple rectangle jam sandwich on multigrain - I think I can get away with calling that the ground for the plant to grow in.
I love this movie. It was one of the last child free ones I saw at the cinema and I'm so glad I can share it with my children now. A children's movie that doesn't have too much scary is a hard thing to find. 

What are your little ones' favourite films?


Details of my tools & toys can be found on this page.

~J

Disclosure: This is not a sponsored post. This post was written for Loving Lunches. No product was received for this post. All opinions expressed are my own, based on my personal experience with the product. This post may contain affiliate links.

Friday 14 November 2014

October on Instagram

How is it November already? I must be having a tonne of fun because time is sure as heck flying by!
A photo posted by Loving Lunches (@lovinglunches) on

A photo posted by Loving Lunches (@lovinglunches) on


A photo posted by Loving Lunches (@lovinglunches) on


A photo posted by Loving Lunches (@lovinglunches) on

A photo posted by Loving Lunches (@lovinglunches) on


A photo posted by Loving Lunches (@lovinglunches) on


A photo posted by Loving Lunches (@lovinglunches) on

A photo posted by Loving Lunches (@lovinglunches) on
And I just realised I didn't get around to sharing the end result.

Details of my tools & toys can be found on this page.

~J

Disclosure: This is not a sponsored post. This post was written for Loving Lunches. No product was received for this post. All opinions expressed are my own, based on my personal experience with the product. This post may contain affiliate links.

Tuesday 11 November 2014

Loving a Challenge. . .

Have you heard about Crunch a Color's 
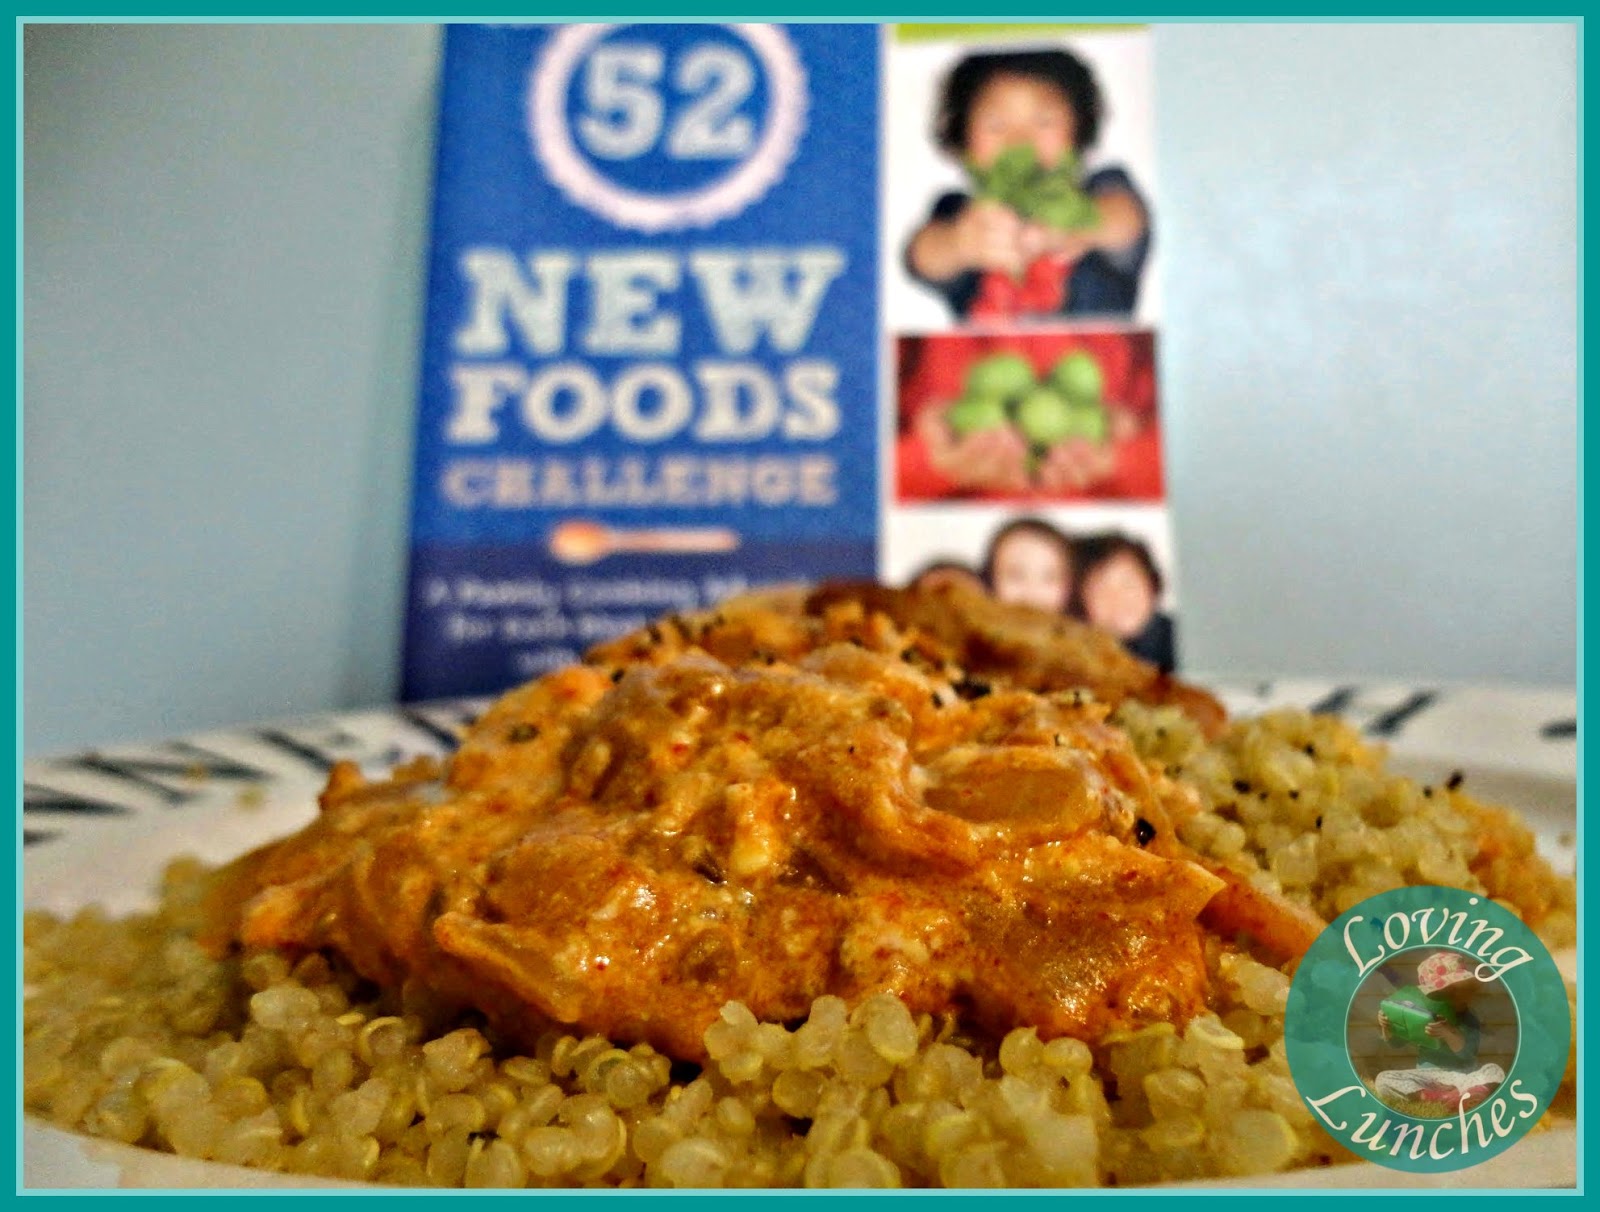
52 New Foods Challenge? Try a new food each week for a year, how simple is that? And there's even an inspiring cookbook you can use! I was lucky enough to receive a copy late last week and couldn't wait to get started! I flipped through the book and one of the recipes that grabbed me was the Whole Wheat Flour pizza base. I didn't have all the ingredients so I opted to try out a variation of something we are familiar with. 52 New Foods doesn't just celebrate new foods, but also new cooking techniques and variations on the old. So Pumpkin, Spinach & Ricotta Pizza was born!

Start by roasting some pumpkin/squash. Coat lightly with oil and bake at 180-200 degrees until soft and tender. Depending on the size of your pieces anything from 30 to 90 minutes. Yes roast with the skin on! It is delicious and gives the cooked pumpkin a fantastic texture!

One of the best things about this pizza is that you get to have roast veggies for dinner the night before! As you can see I like a touch (or more) colour on my roast pumpkin.

Don't forget to bake extra pumpkin and once cooled store in a covered container in the fridge. You can also toss in whatever other leftover vegetables you have. These peas were a perfect addition.

Spread your chosen pizza base (this is a store bought tortilla, the girls had corn tortillas, but I am looking forward to making this on the whole wheat flour base from the 52 New Foods book) with a little sauce and *lots* of pumpkin.

I simply scooped the flesh from the skin and smushed it onto the base, swirling and spreading. This is a great step to get the children involved in!

Blanch some baby spinach leaves in boiling water for a minute or two until bright green and tender. Drain and squeeze away excess moisture. You can leave whole, but I like to roughly chop.

I always have some zip lock bags of capsicum/bell peppers in my freezer. Whenever I see them on special I grab a few and if they are not used straight away they get sliced or diced and thrown straight in. They are perfect for adding a little colour (and extra vegetables!) to pizzas, pasta sauces, soups, you name it!

One you have all your ingredients prepped you can call in the creative genius that is your offspring to help layer up your pizzas. Start adding your ingredients form the outside of the pizza and drag them inwards rather than dumping them all in the middle and spreading them outwards. See, my time at Pizza Hut did prove educational!

Spinkle a little grated mozzarella on your pumpkin and tomato paste base, then add a little sliced ham, pepperoni, diced capsicum/bell pepper, baby spinach, some of those peas for last night's dinner gently smashed and a few dollops of ricotta.

Lastly add another layer of grated mozzarella (or any other hard grated cheese) and a swirl of sauce if desired. 

Once Miss M saw my BBQ sauce swirl she wanted a tomato sauce swirl too.

Bake at 180-200 degrees until the cheese has melted and started to turn golden. The mini sized ones took about 15 minutes.

And the mummy sized one took about 25, but I do refer a little more colour :-)

How gorgeous is that!

A perfect way to try something new is to mix it with something old - who doesn't love pizza?

And these bases are so thin that you can roll each slice into a perfect toddler or baby sized morsel. Not that they lasted long enough to photograph!

And what do you do with the pumpkin seeds? Well roast them of course! There's a simple recipe in the 52 New Foods book that's going on my make list (since my first attempt was less than successful).

Details of my tools & toys can be found on this page.

~J

Disclosure: This is not a sponsored post. This post was written for Loving Lunches & 52 New Foods Challenge who generously provided me with a copy of their book. All opinions expressed are my own, based on my personal experience with the product. This post may contain affiliate links.
Pin It button on image hover